Your Thermador appliance is the heart of your kitchen, a symbol of luxury and performance in your Beverly Hills home. So, when it stops working correctly, it can disrupt your entire routine. While some issues demand immediate professional appliance repair, many common problems have surprisingly simple solutions you can handle yourself. This guide will walk you through six fast Thermador repairs in Beverly Hills that can save you time and hassle, and we’ll also clarify when it’s essential to call in an expert.
Easy Fix #1: Resetting Your Thermador Oven Controls
Is your Thermador oven displaying a confusing error code or has the control panel become unresponsive? Before you panic, a simple reset might be all you need. Electronic glitches can sometimes cause the oven’s computer to freeze or malfunction, and a quick power cycle can often get things back in working order.
This is one of the easiest first steps in troubleshooting your Thermador appliance. It doesn’t require any tools and takes just a few minutes to complete. If the issue is a minor software bug, this simple Thermador repair can resolve it instantly. Let’s look at the correct way to perform a reset.
Step-by-Step Guide to Safely Resetting Your Thermador Oven
Resetting your Thermador oven can clear temporary electronic faults. For safety, ensure the oven is off and completely cool before starting.
To reset:
- Carefully pull the oven away from the wall to access the power cord.
- Unplug the oven from the outlet.
- Wait at least five minutes for internal capacitors to discharge.
- Plug the oven back in securely.
- Restart the oven and check if the control panel works.
If this fixes the issue, you’ve avoided a service call. If not, a deeper problem may exist.
When a Reset Doesn’t Solve the Problem
If resetting doesn’t restore normal function or error codes persist, there may be a faulty control board, thermostat, or temperature sensor. These issues require professional repair for safe and effective resolution.
A certified technician can accurately diagnose and replace faulty components, ensuring your Thermador oven is safely restored to optimal performance.
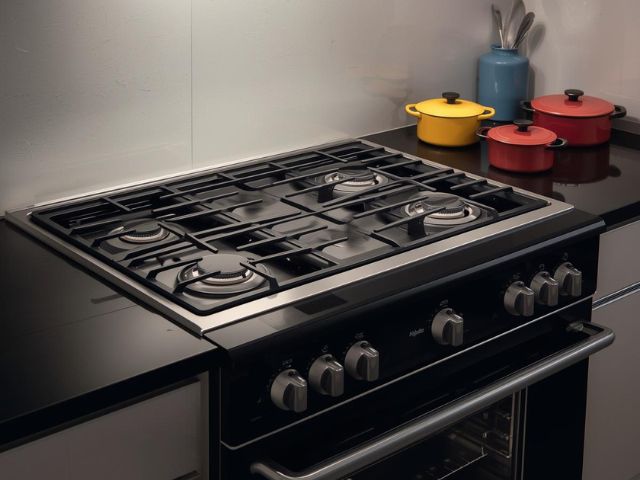
Easy Fix #2: Fixing Uneven Burner Flames on Your Thermador Cooktop
A key feature of a Thermador gas cooktop is its powerful and precise Star® Burners. When you notice a burner flame is weak, uneven, or sputtering, it can make cooking difficult. Fortunately, this is often caused by debris or food spills clogging the burner ports.
This is a common issue that you can usually resolve with a thorough cleaning. Before you schedule a Thermador appliance repair service, take a few minutes to inspect and clean the burners. This simple maintenance task can restore your cooktop’s performance and ensure you get the even heat needed for perfect cooking results.
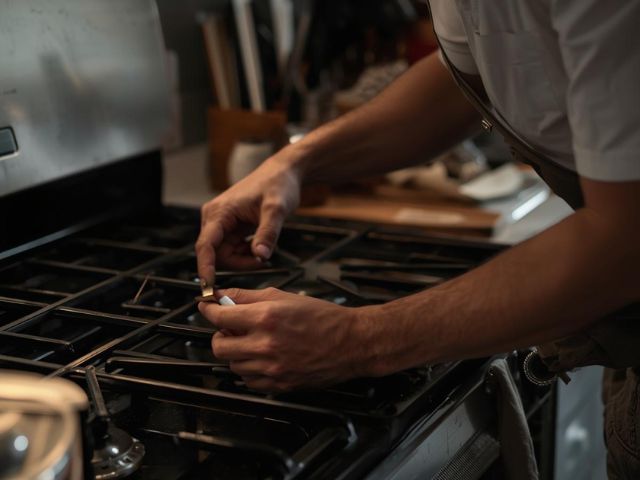
How to Safely Clean Thermador Cooktop Burners
Cleaning your Thermador cooktop burners improves flame distribution and performance. Before starting, ensure the cooktop is cool and the gas supply is off.
You’ll need only basic household items for cleaning:
- Remove burner grates and caps; wash with warm, soapy water.
- Use a small brush or toothbrush to scrub burner ports.
- Clear stubborn debris from ports with a thin wire or paperclip.
- Wipe the burner assembly with a damp cloth.
- Let all parts dry completely before reassembling.
Regular cleaning prevents buildup and keeps your appliance working efficiently. If issues persist after cleaning, contact professional Thermador repair services.
Adjusting Burner Flame for Better Cooking Results
- After cleaning, flames should be blue and steady. Yellow, uneven flames or “poofing” sounds suggest deeper issues like a faulty igniter or gas supply problem. Do not attempt complex repairs yourself—these require expert attention. Contact professional appliance repair for safe, same-day service in Beverly Hills if needed.
Easy Fix #3: Addressing Thermador Refrigerator Cooling Problems
There’s nothing more frustrating than a refrigerator that won’t keep your food cold. When your Thermador refrigerator starts to lose its chill, one of the most common culprits is surprisingly easy to fix. Dirty condenser coils are often to blame for inefficient cooling.
Over time, these coils, which are responsible for releasing heat from the refrigerant, can become covered in dust, pet hair, and other debris. This buildup forces the compressor to work harder and less efficiently. Before you call for Thermador appliance repair, check your condenser coils—a quick cleaning could be all the Thermador repair it needs.
Checking and Cleaning Refrigerator Coils
- Dirty condenser coils often cause cooling issues, but cleaning them is easy. First, locate the coils—usually at the bottom or back of Thermador refrigerators; check your owner’s manual for specifics. Unplug the refrigerator before starting. Use a vacuum with a brush attachment and a coil cleaning brush to remove dust and debris. Clean coils every six months to boost efficiency and prevent repairs. If cooling doesn’t improve after cleaning, consider professional Thermador repair.
Troubleshooting Door Seal and Temperature Settings
- If coil cleaning doesn’t solve the issue, check the door seal for drafts by running your hand along its edge. Clean dirty gaskets with warm, soapy water; replace cracked or warped seals for proper efficiency. Also, verify temperature settings: fridge at or below 40°F, freezer at 0°F. Persistent problems may indicate a faulty sensor or fan requiring professional repair.
Easy Fix #4: Repairing Stuck or Flickering Oven Light
An oven light that is flickering or completely burnt out is a minor annoyance, but it makes it difficult to monitor your food as it cooks. You might be tempted to ignore it, but this is one of the quickest and easiest DIY repairs you can perform on your Thermador appliance.
In most cases, a flickering or dead oven light is simply due to a burnt-out bulb. Replacing it is a safe and simple task that doesn’t require any special skills or tools. This quick Thermador repair will illuminate your oven once again, so you can keep a close eye on your culinary creations.
Replacing a Thermador Oven Light Bulb
- Replacing your Thermador oven light bulb is quick and easy. First, ensure safety by unplugging the oven or turning off the circuit breaker. Once the oven is cool, locate the bulb cover inside (usually glass or metal), remove it, and unscrew the old bulb. Install the correct replacement bulb as specified in your manual, reattach the cover, and restore power. If the light still doesn’t work after replacing the bulb, a deeper electrical issue may be present.
Troubleshooting Persistent Oven Light Issues
- If a new bulb doesn’t fix the problem or if the light flickers, there may be an underlying electrical fault—such as a bad socket, wiring issue, or faulty control board. These repairs require professional expertise to avoid injury or further damage. For ongoing issues, contact a qualified Thermador technician for safe and effective repair.
Easy Fix #5: Cleansing and Deodorizing Thermador Ice Makers
Is your Thermador ice maker producing ice that tastes or smells strange? Or perhaps it’s not producing ice as quickly as it used to. These are common issues that can often be resolved with a thorough cleaning. Over time, minerals from your water and food odors from the freezer can build up in the ice maker.
This buildup can affect the quality of your ice and the performance of the unit. A deep clean is a simple form of appliance repair that you can do yourself to restore fresh-tasting ice and optimal function. Let’s walk through how to clean the components properly.
Removing and Cleaning Ice Maker Components
- To keep your ice tasting fresh, start by turning off your ice maker. Remove the ice storage bin from the freezer and discard any old ice to eliminate odors. Clean the bin with mild soap and warm water, or use a water-vinegar mix as a natural deodorizer. Rinse thoroughly to remove residue, wipe the interior with a damp cloth, and ensure everything is dry before reassembly. This simple routine greatly improves ice quality. If problems persist, consider professional Thermador repair for internal issues.
How to Reset Your Ice Maker
- After cleaning, reset your ice maker for optimal performance. Most Thermador models have a reset button—press and hold it for a few seconds to start a new cycle. If there’s no reset button, turn off the unit for one minute then power it back on; some models may require unplugging the refrigerator for five minutes. Persistent issues may indicate clogged water filters, faulty valves, or control module malfunctions—these require expert appliance repair.
Easy Fix #6: Quieting a Noisy Thermador Freezer
Is a loud or unusual noise from your Thermador freezer disrupting the peace and quiet of your kitchen? While some sounds are part of normal operation, new or excessively loud noises often indicate a problem. One of the most common causes of freezer noise is an obstructed fan.
The evaporator or condenser fans, which circulate air to maintain temperature, can become noisy if they are dirty or blocked by ice buildup. This is often a problem you can investigate and fix yourself before calling for Thermador appliance repair. A quick inspection and cleaning could be all that’s needed for a quieter freezer.
Inspecting and Cleaning Freezer Fans
If you suspect your freezer fan is noisy, a careful inspection and cleaning may fix the issue. The evaporator fan is typically behind a rear panel inside the freezer. Always unplug the refrigerator before starting.
Steps:
- Unplug the refrigerator.
- Remove shelves and the back panel to access the fan.
- Check for ice buildup or debris around the fan blades.
- Clear any obstructions and wipe the blades clean.
- Reassemble, restore power, and check for noise.
If noise persists, the fan motor may be failing and needs professional Thermador repair.
When Strange Noises Mean You Need a Technician
While rattling fans are often DIY fixes, other sounds signal serious issues like failing compressors or motors—these require expert repair to avoid costly damage.
Guide to Common Appliance Noises:
- Whirring/Rattling: Clean the fan; call an expert if noise continues.
- Loud Buzzing/Humming: Call immediately—possible compressor failure.
- Constant Clicking: Common with igniters; call if burner won’t light.
- Grinding/Squealing: Call immediately—likely a failing motor.
Make Appliance Breakdowns a Thing of the Past—Thermador Repair Group
While these DIY fixes can handle many common issues, some repairs require an expert touch. For complex problems or when you simply want the assurance of a professional, our team is here to help. We at Thermador Repair Group specialize in Thermador repair, providing fast, reliable service to families across Beverly Hills. Our certified technicians are factory-trained and have the advanced diagnostic tools to accurately identify and resolve any issue, from a faulty control board to a failing compressor.
We pride ourselves on using only genuine Thermador parts to ensure every repair restores your appliance to its peak performance and longevity. With transparent, flat-rate pricing and a commitment to customer satisfaction, we make the repair process hassle-free. Whether you need emergency service or routine maintenance, trust us to provide the expert Thermador repair services that keep your luxury appliances running flawlessly.
Conclusion
In summary, understanding how to tackle common Thermador repairs in Beverly Hills can empower homeowners to maintain their kitchen efficiently. From resetting your oven controls to addressing cooling problems in your refrigerator, these easy fixes not only save time but also prevent more significant issues down the line. By becoming familiar with the signs of trouble and incorporating basic troubleshooting practices, you can extend the life of your appliances. However, when situations escalate beyond simple repairs, don’t hesitate to reach out for expert help. For more insights and helpful tips, be sure to check out our blog post about How Tech Changes the Game with Thermador Repairs in Seattle.
Frequently Asked Questions
How quickly can I book a Thermador appliance repair in Beverly Hills?
Booking a Thermador appliance repair in Beverly Hills is fast and convenient. Most professional services allow you to schedule an appointment by phone or through an online booking form. Many companies prioritize prompt service and can often arrange for a technician to visit your home quickly, sometimes even on the same day you call.
What is the average cost of Thermador appliance repair in Beverly Hills?
Thermador appliance repair in Beverly Hills typically costs $150–$500, depending on the issue and appliance type. Complex repairs may be higher. With our transparent, flat-rate pricing, you’ll know costs upfront. Always request a detailed estimate before work begins.
What should I consider when choosing a Thermador repair technician in Beverly Hills?
When choosing a Thermador repair technician in Beverly Hills, consider these factors:
- Experience and Credentials: Choose technicians with specialized Thermador training and relevant certifications.
- Customer Reviews: Check online reviews for positive feedback and reliable service.
- Warranty on Repairs: Ensure the technician offers warranties or guarantees on their work.
Is same-day Thermador appliance repair available in Beverly Hills?
Yes, many Thermador repair services in the Beverly Hills area offer same-day appointments. Availability depends on the time you call and the technicians’ schedules. To increase your chances of getting same-day service, it’s best to call early in the day to secure a spot for your Thermador appliance repair.
Do Beverly Hills Thermador repair services guarantee their work?
Reputable Thermador repair in Beverly Hills services typically stand behind their work. Most offer a warranty or guarantee on both the parts they use and the labor they provide. This ensures that if the same issue arises again within the warranty period, the technician will return to fix it, giving you confidence in the repair.


